Parachim Vinylester - Two-component chemical sealing mortar - DL Chemicals

Styrene-free, two-component chemical anchoring mortar for tension-free anchoring of heavy loads using rods. ETA-approved for uncracked concrete and hollow and solid masonry. Can be used in dry, wet, and flooded boreholes without loss of performance.

Packaging:
$12.05Tax Included

Volume discounts

QuantityYou SaveUnit price
125 %$11.44
6010 %$10.84
12015 %$10.24
DLC 104696
5413624023617

Parachim Vinylester - Two-component chemical sealing mortar - DL Chemicals

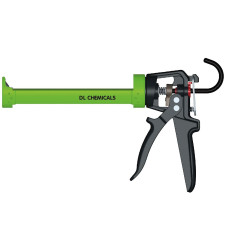
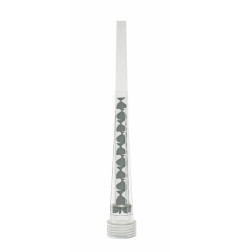
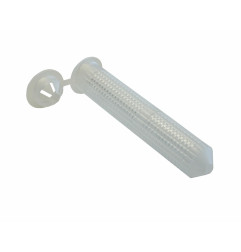
Styrene-free, two-component chemical grouting mortar for tension-free anchoring of heavy loads using rods. With ETA approval for uncracked concrete and hollow and solid masonry. Can be applied in dry, wet, and flooded boreholes without loss of performance. Thixotropic and suitable for overhead applications. Also with ETA approval for the retrofitting of reinforcing bars in reinforced concrete. With color indicator for visual monitoring of the open time (blue turns gray). Can be applied with a high-quality electric, pneumatic, or manual caulking gun with a high transmission ratio.

  • Two-component sealing mortar for anchoring in hollow and solid materials
  • Superior performance for structural applications
  • Perfect for all types of fixing without constraint
  • Styrene-free, can be used in confined spaces
  • No cutting, ready to use
  • Suitable for dry, wet and flooded holes without loss of performance
  • Ceiling mounting (without additional accessories)
  • Fast charging time
  • With setting indicator for handling time (the blue resin turns gray)
  • The anchor can be placed near the edges (see installation parameters)
  • Extrusion with a standard gun
  • Resistant to chemicals (many acids, bases, solvents, hydrocarbons, sea water)

Applications:

  • Perfect for all types of tension-free anchors in solid materials (concrete, solid masonry, rock, hard natural stone) and in hollow materials (hollow masonry and hollow blocks). The anchor is suitable for uncracked concrete, reinforced or unreinforced, from strength class C20/25 up to a maximum of class C50/60. Can be used for structural anchoring applications (heavy loads) for fixing awnings, canopies, machinery, railings, balustrades, brackets, shelves, water heaters, air conditioners, panels, roller shutters, masonry supports, satellite dishes...
  • Ceiling mounting (without additional accessories).
  • Retrospective installation of reinforcement in reinforced concrete: installation of a balcony, extension of a building, replacement or addition of a floor slab, reinforcement of a wall... For retrofitting of rebars: suitable for reinforced or unreinforced concrete of strength class C12/15 up to a maximum of C50/60.
  • Suitable for dry, wet and flooded holes without loss of performance.

Instructions for use:

PART I. STRUCTURAL ANCHORING APPLICATIONS

  1. Preparation :
    • Drill the hole with a hammer drill to the correct diameter at the required anchoring depth.
    • Clean the hole thoroughly. For cleaning, the borehole must be free of water. For holes 400 mm deep or less, manual cleaning can be done with a blower pump. Cleaning with compressed air can be done for all borehole diameters. Use a brush with the same diameter as the borehole and use clean compressed air. Clean in the following sequence: For hollow materials: brush once, then blow once. For solid materials: blow twice, then brush twice with a cleaning brush in a back-and-forth motion, blow twice, then brush twice again, and blow twice more.
    • In hollow or perforated masonry: insert the appropriate injection screen.
    • Once the hole is prepared, open the cartridge and screw the mixing tip onto the cartridge. Insert the cartridge into the standard gun. Extrude the first part of the cartridge until you obtain a uniform, streak-free resin color.
  2. Chemical anchor injection:
    • Extrude the material and slowly remove the mixing tip from the hole or screen, ensuring there are no air gaps when the mixing tip is removed. For solid materials: fill the hole approximately 1/2 to 3/4 full and completely remove the mixing tip. For hollow materials: fill the screen completely.
  3. Insert the threaded rod:
    • Immediately insert the clean threaded rod (free of oil and formwork release agents) to the bottom of the hole using a back-and-forth twisting motion ensuring all threads are well coated. Adjust to the correct position within the specified handling time (see table).
    • Excess product will be expelled from the hole evenly around the threaded rod, indicating that the hole is full. This excess product must be removed from the edges of the hole before curing.
    • Allow the mortar to harden. Do not stir the mortar until the loading time has elapsed (depending on the base material conditions and ambient temperature).
    • Place the part to be fixed and load it after the loading time has elapsed. Tighten the nut to the recommended torque. Do not overtighten.
    • Leave the mixing tip on the cartridge. Change to a new tip for the next application.

PART II. POST-INSTALLATION OF REINFORCEMENT

  1. Preparation :
    • In case of charred surface of the existing concrete structure, the charred layer should be removed around the place where the hole is drilled in a circle with a diameter ds + 60 mm. The above can be ignored if the building components are new and not charred.
    • Use a rotary hammer drill equipped with a carbide bit or a compressed air hammer drill to drill the holes. Drill the hole with the appropriate diameter to the required anchorage depth. Pay attention to the concrete coverage c, as indicated in the installation parameters. Drill parallel to the edge and the existing reinforcement. If the drill hole fails, the hole must be filled with mortar.
    • Clean the hole thoroughly. For cleaning, the borehole must be free of water. For holes with a depth of 300 mm or less, manual cleaning can be done with a bellows pump. Compressed air cleaning can be done for all borehole diameters. Use a brush with the same diameter as the borehole diameter and use clean compressed air. Blow cleanly twice, then brush cleanly twice with the cleaning brush in a back-and-forth motion, repeat these steps (blow cleanly twice, then brush cleanly twice) and blow cleanly again twice.
    • Place the rebar in the borehole to determine the embedment depth (lv). Mark the embedment depth (lv) on the rebar with tape or a marker. Remove the rebar from the borehole.
    • Mark this same embedment depth on the static mixer tip with tape or a marker, along with the required mortar level length (lm). The required mortar level should be approximately 1/2 to 3/4 of the embedment depth.
    • Twist the cartridge cap and screw the static mixing tip onto the cartridge mouth. Place the cartridge in the caulking gun. Dispense the first portion until a uniform color is achieved and no streaks are visible in the product.
  2. Chemical anchor injection:
    • If there is water present in the hole after the initial cleaning, remove this water before injection.
    • Insert the static mixing tip all the way to the bottom of the borehole. Begin dispensing the product and slowly withdraw the static mixing tip from the borehole, being careful not to create air voids. Fill the borehole to the indicated mortar level (lm) on the mixing tip. This is approximately 1/2 to 3/4 of the borehole. Then, withdraw the static mixing tip.
  3. Insert the rebar:
    • Immediately insert the clean rebar* to the bottom of the hole. Do this in a back-and-forth rotational motion, so that all the wires on the bar are thoroughly covered with the chemical sealant. During the specified working period (see table), the rebar must be positioned correctly. (*Free from oil and other release agents).
    • Any excess product should be evenly pushed out of the hole around the rebar as it is inserted, indicating that the hole is full. Excess product should be removed around the hole opening before it hardens.
    • Place the part to be fixed and load it after the loading time has elapsed. Tighten the nut to the recommended torque. Do not overtighten.
    • Leave the mixing tip on the cartridge. Change to a new tip for the next application.

Packaging:

  • 300 ml cartridge
DL Chemicals
DLC 104696

Data sheet

Signal word
WARNING
Hazard statements
H315 – Causes skin irritation.
H317 – May cause an allergic skin reaction.
H319 – Causes serious eye irritation.
H410 – Very toxic to aquatic life with long lasting effects.
H412 – Harmful to aquatic life with long lasting effects.
Hazard pictogram
Hazard pictogram : GHS07 - Harmful GHS07 - Harmful
Hazard pictogram : GHS09 - Environmental hazard GHS09 - Environmental hazard
 

Specific References

EAN13
5413624023617

Quelles sont les déclinaisons et prix pour Parachim Vinylester - Two-component chemical sealing mortar - DL Chemicals ?

Parachim Vinylester - Two-component chemical sealing mortar - DL Chemicals - Déclinaisons, dimensions, prix, références
Variante Packaging Prix HT Prix TTC Prix dès 12 pièces (-5%) (TTC) Prix dès 60 pièces (-10%) (TTC) Prix dès 120 pièces (-15%) (TTC) Réference EAN-13 Stock* disponible
Parachim Vinylester - Two-component chemical sealing mortar 300 ml cartridge $10.04 $12.05 $11.44 $10.84 $10.24 DLC 104696 5413624023617 Arrivage
*Stocks disponibles, sauf erreur ou omission, en nos entrepôts de Lille (France) ou Tournai (Belgique), livraison en 24h/72h - Enlèvement gratuit - Expédition à partir de 4,99 € en France, 3,99 € en Belgique selon poids, délai et transporteur.